
Editor guide
Your design —
step by step
From your first photo to an order PDF. We demonstrate with a round keychain and the Ukrainian flag.

9 steps to your order
The numbers on the screenshots show where to tap. Open any screenshot to enlarge it. Product photos, prices and some buttons may change.
Choose a product
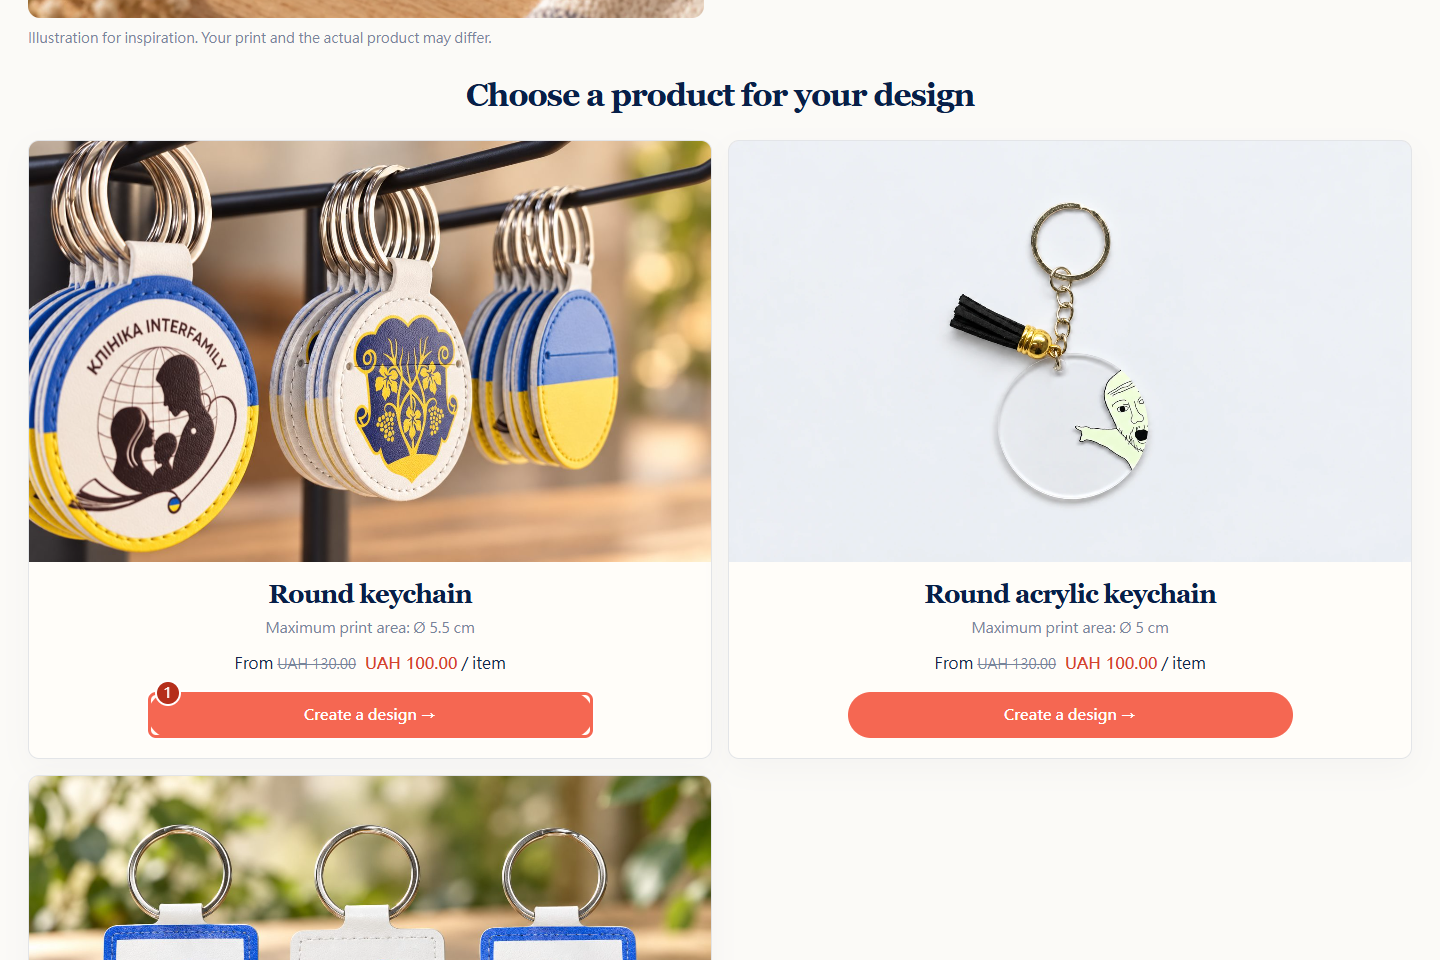
Open the category you want on the website and choose a product. In this example, we will make a round keychain with the Ukrainian flag.
Click “Create a design →” (1) on the product card.
Add a photo or illustration
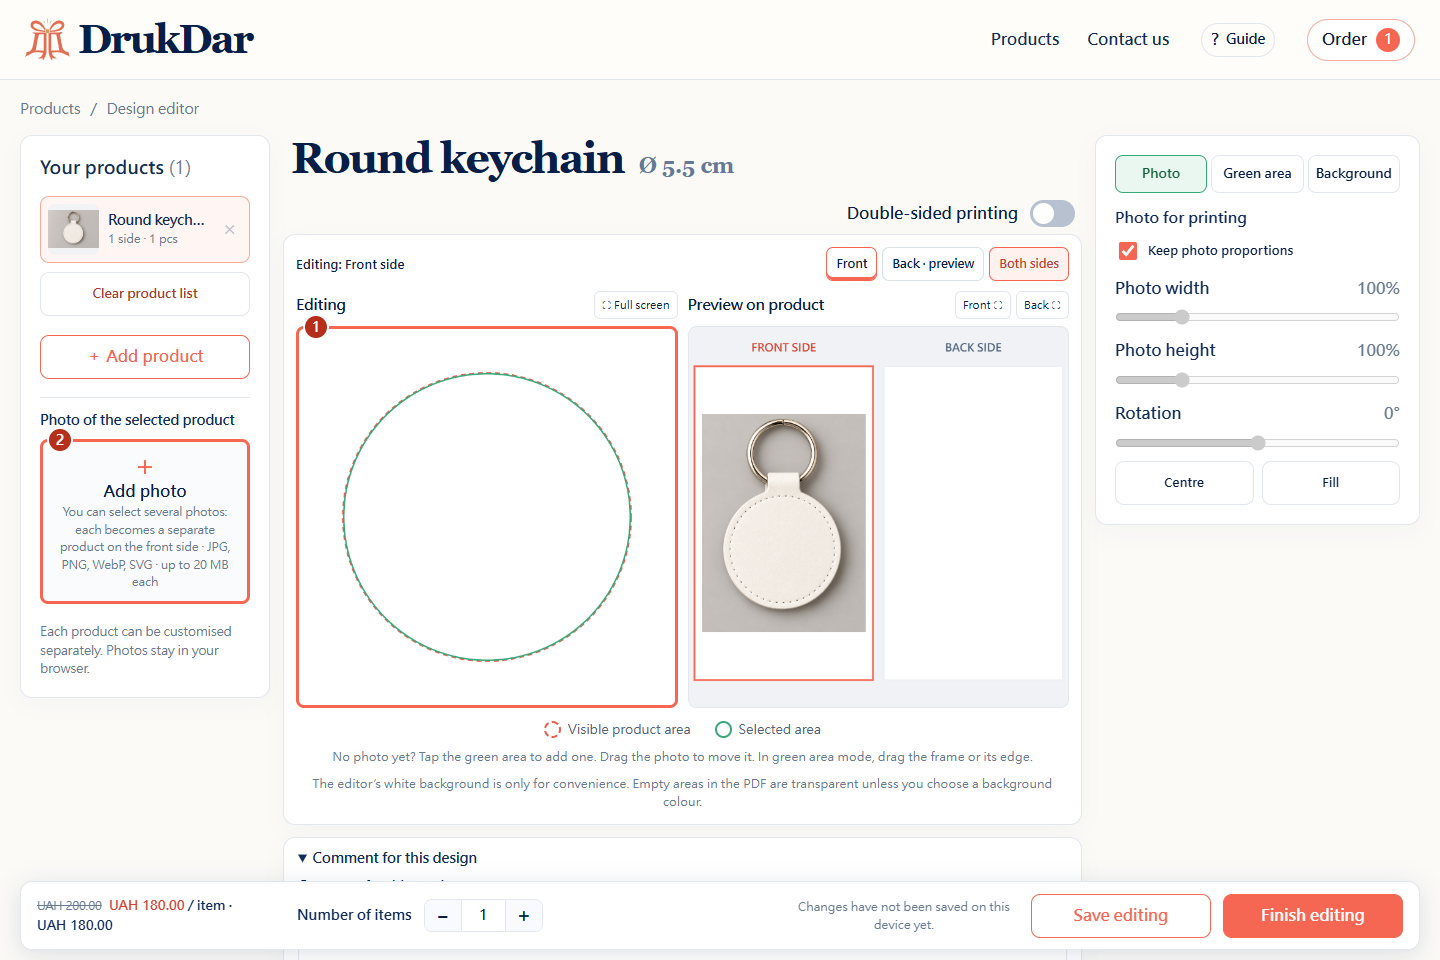
Tap the empty green area (1) and choose a file on your phone. Alternatively, open “Products / add photo” (2) and tap “Add photo”.Click the empty green area (1) or “Add photo” in the left column (2), then choose a file on your computer.
JPG, PNG, WebP and SVG are supported, up to 20 MB each. For practice you can use this Ukrainian flag.
Position the image
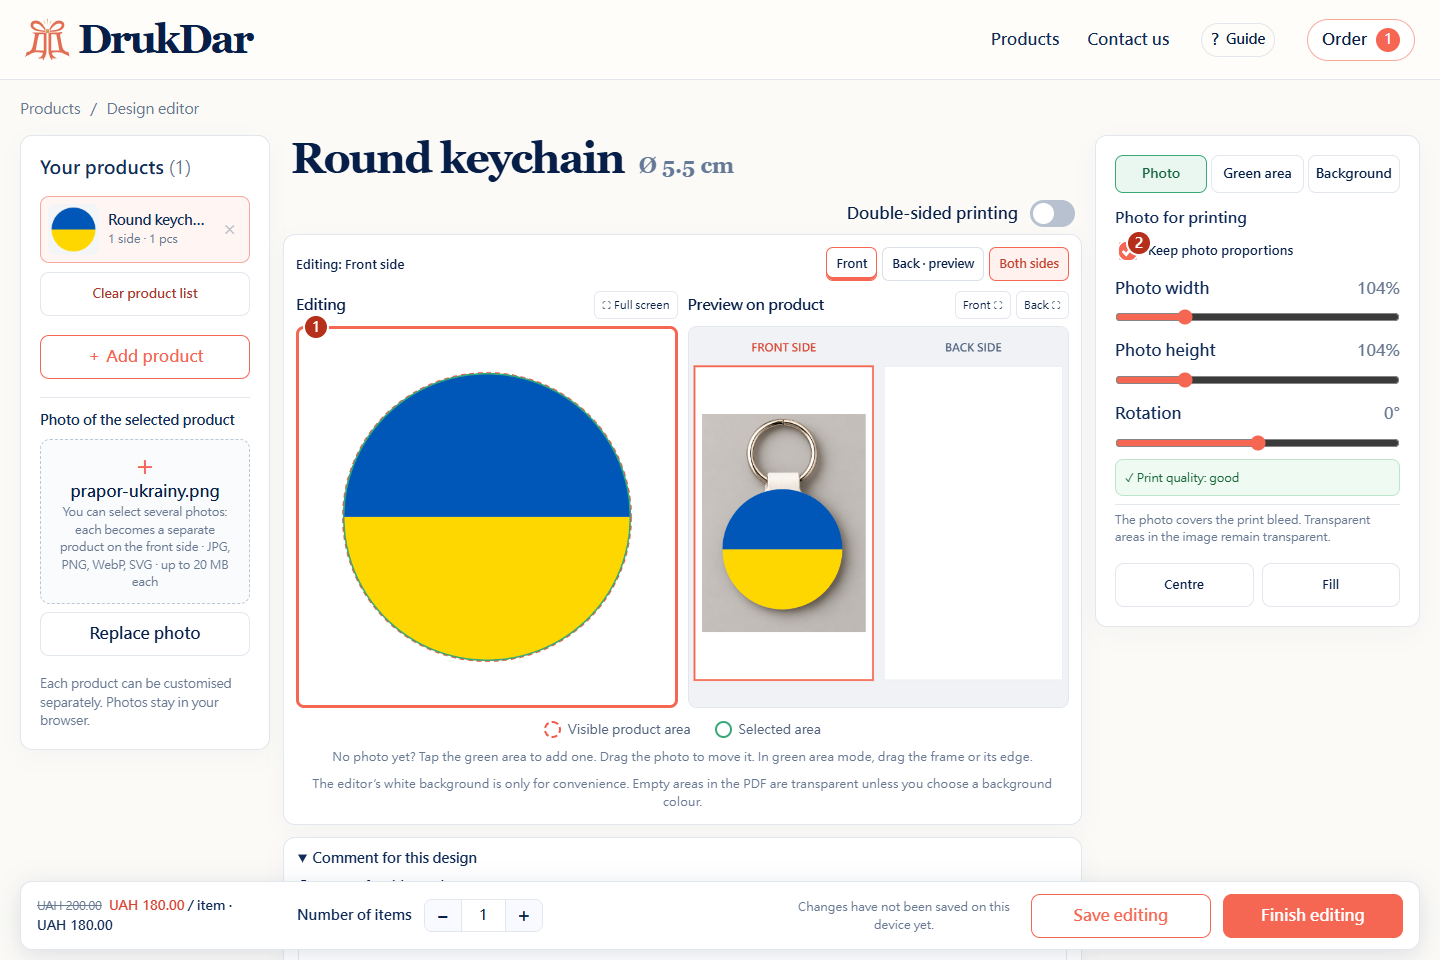
The photo automatically expands to the print edges, including the extra margin beyond the product edge — bleed. Proportions are preserved; parts beyond the product are cropped.
Drag the photo in the editing area (1) to move it. To adjust its size and rotation, open the “Photo” tab below the editor.Drag the photo in the editing area (1). Use the sliders on the right to adjust size and rotation.
Keep “Keep photo proportions” (2) enabled so the image does not stretch. Keep faces and important text away from the edge.
Check the product preview
Click “Product preview”, to see the flag on the keychain. The “← Edit” button (1) returns to editing.On the right of the editor you can see “Preview on product” (1). It updates automatically after every change.
Check placement, cropped edges and text readability. If needed, use “Full screen”.
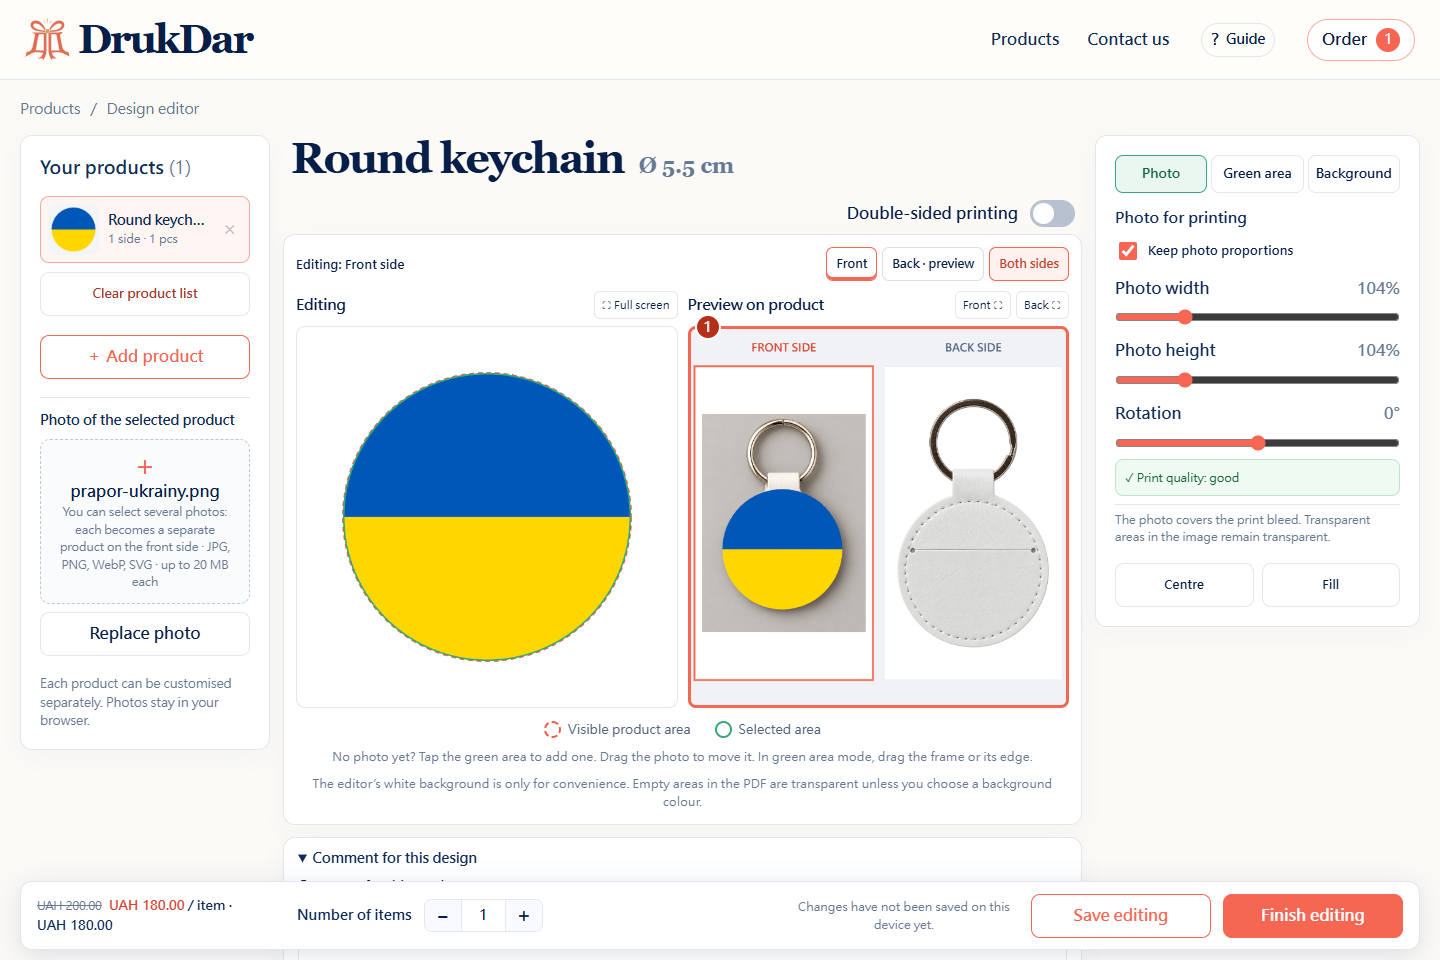
The on-screen preview is a guide. Printed colours can differ because of your screen and the product material.
Back to steps ↑Need printing on both sides?
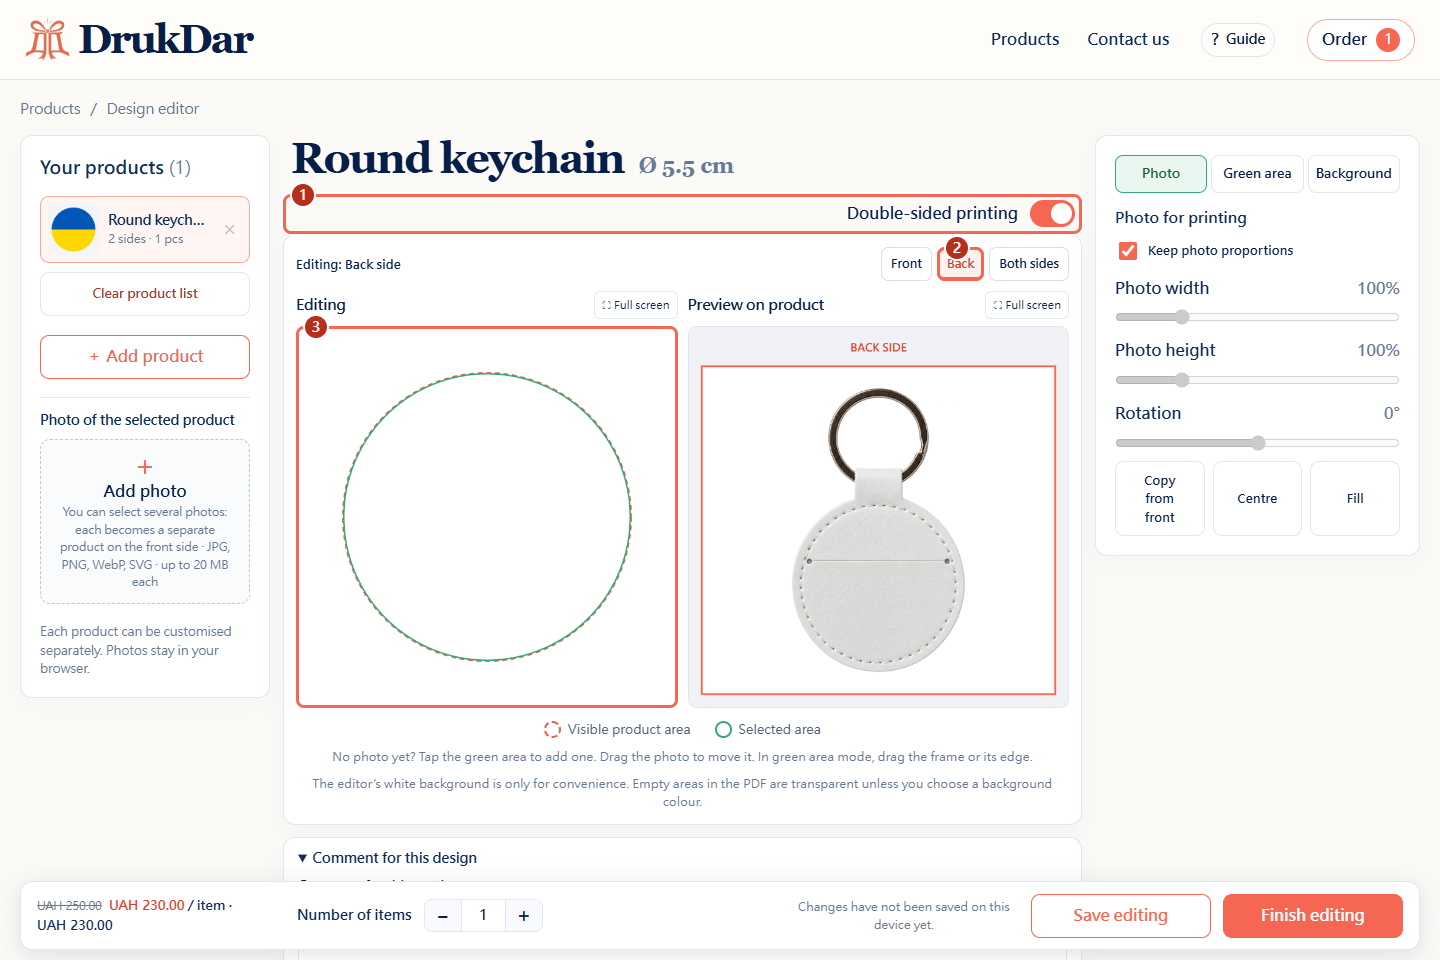
If the product supports double-sided printing, enable “Double-sided printing” (1). Choose “Back” (2) and add a file to the empty area (3).
Our example uses the same flag on both sides. You can choose a different image for each side. The “Both sides” button helps you check them together.
Set the quantity and your requests
Open “Comment for this design” below the canvas and enter your requests in the field (1).In the “Comment for this design” field below the canvas (1), you can leave requests for this product.
For example: “Ukrainian flag on both sides”. The comment is optional and appears beside the relevant product in the PDF.
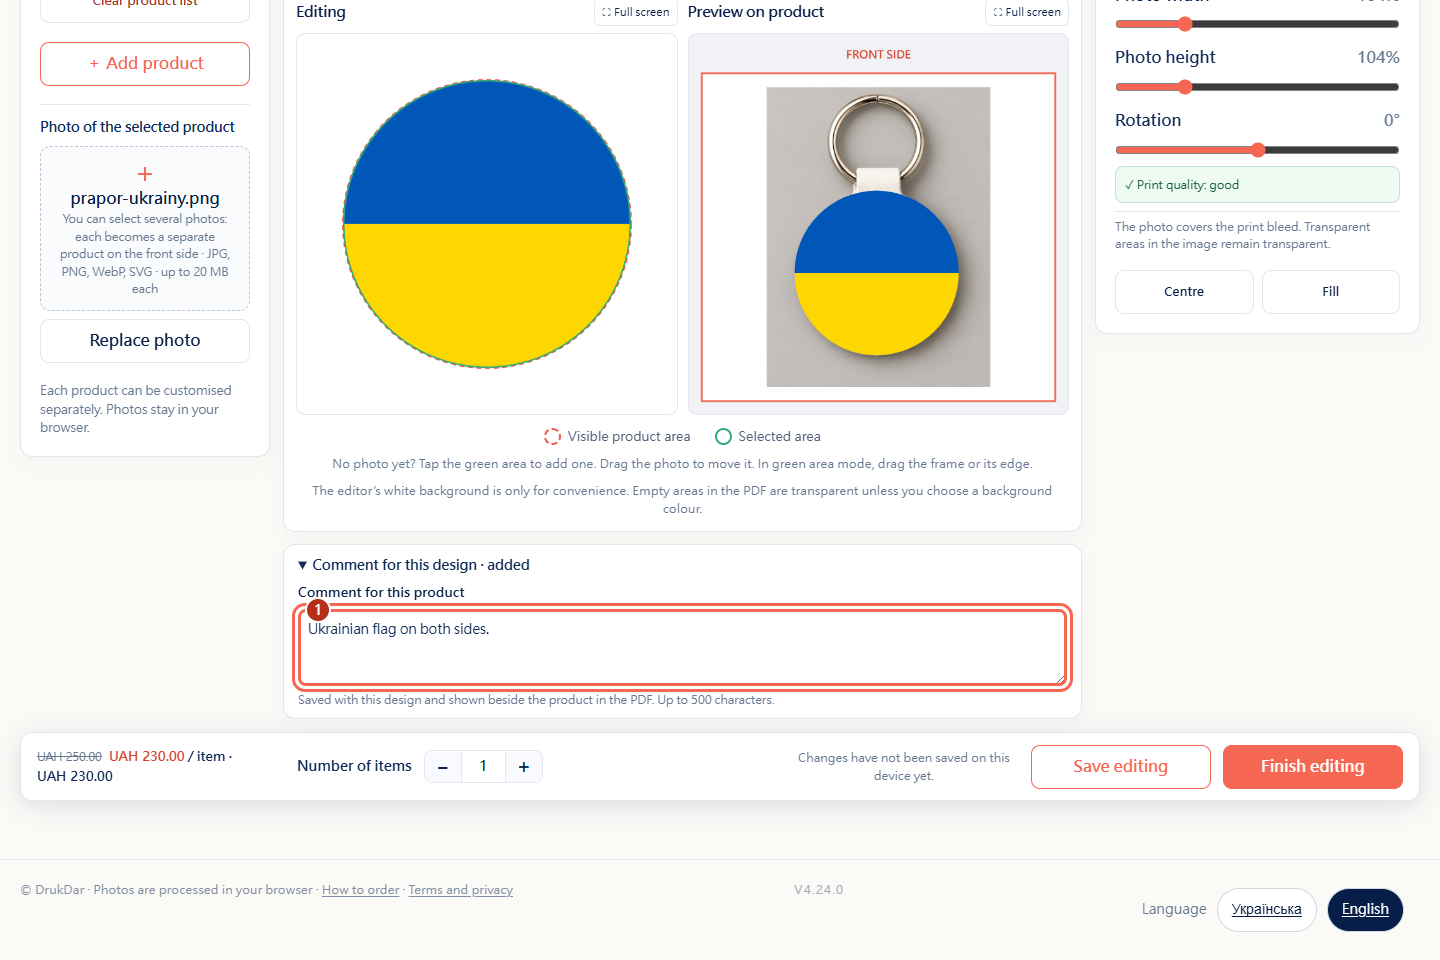
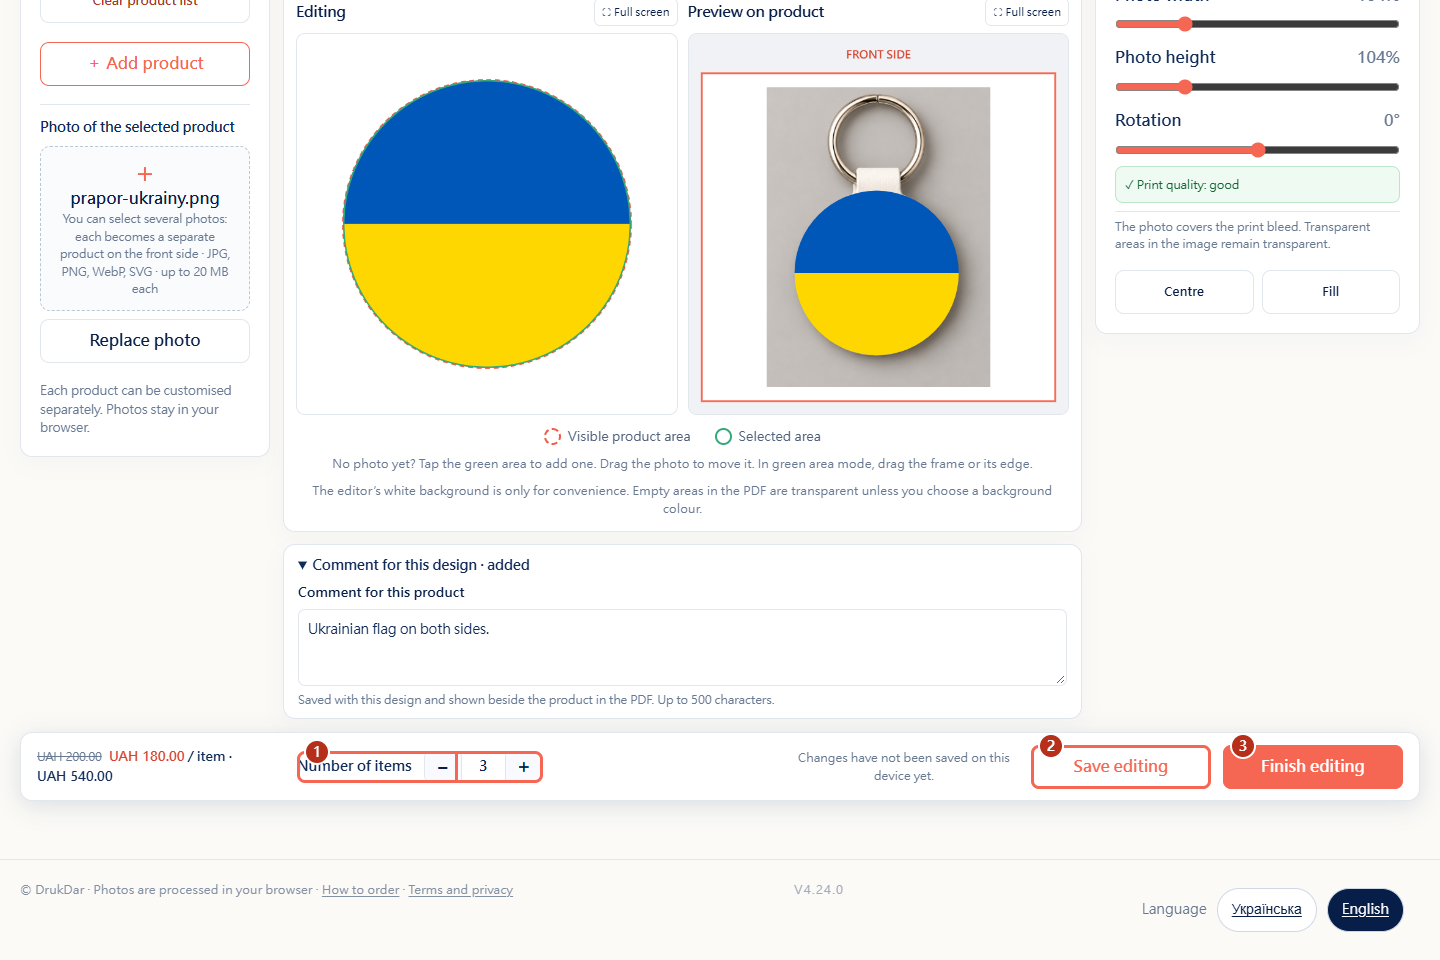
In the bottom panel, set the quantity (1). Our example uses three identical keychains.
“Save editing” (2) keeps the cart in the browser on this device. When everything is ready, click “Finish editing” (3).
Review the entire order
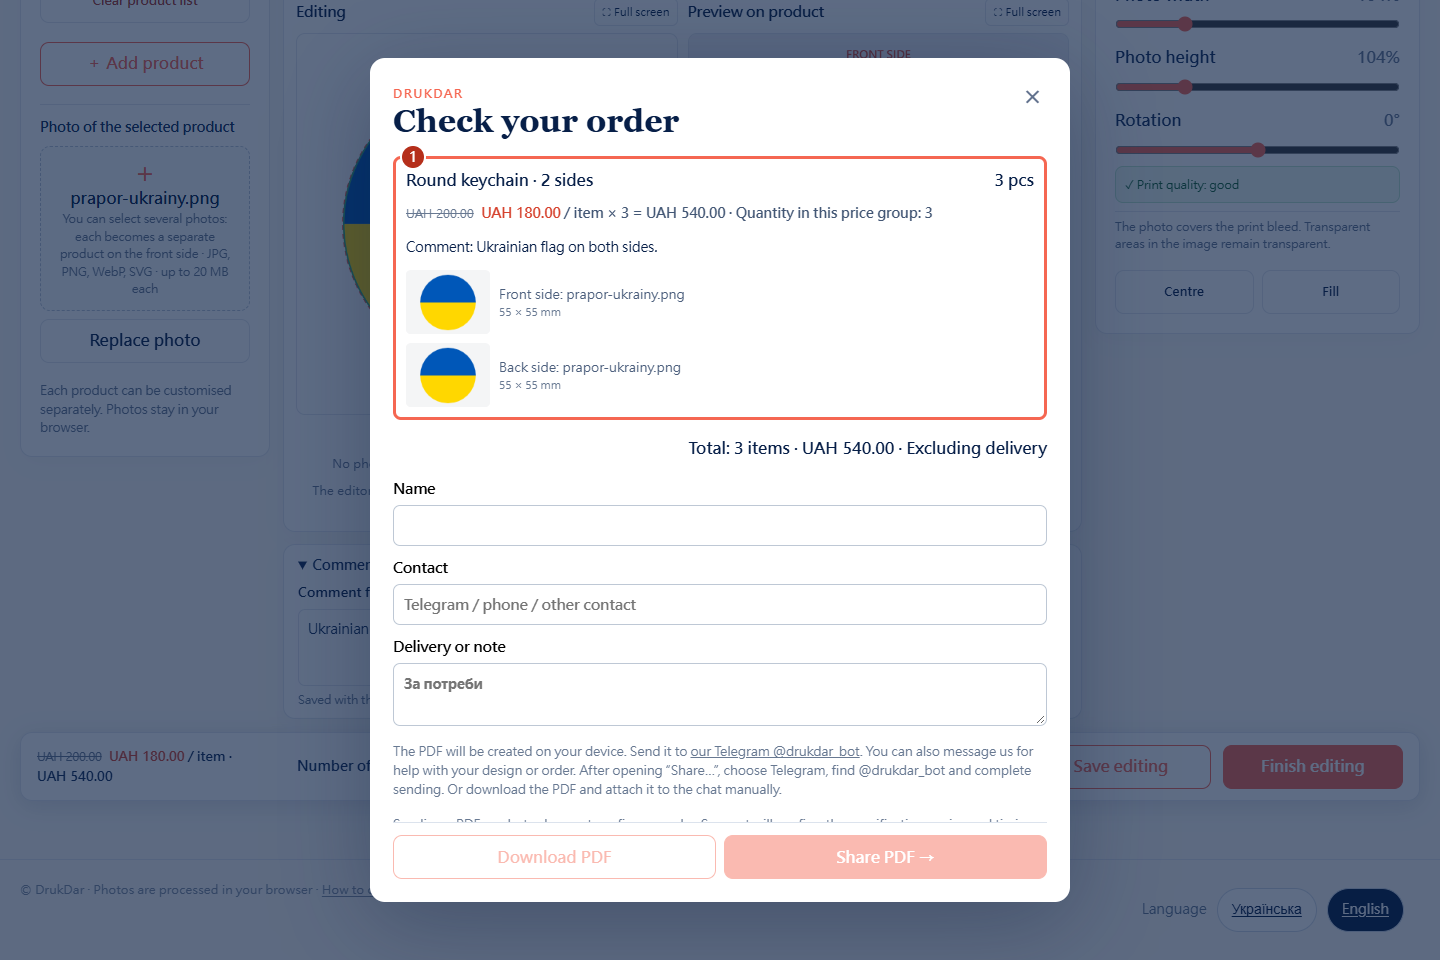
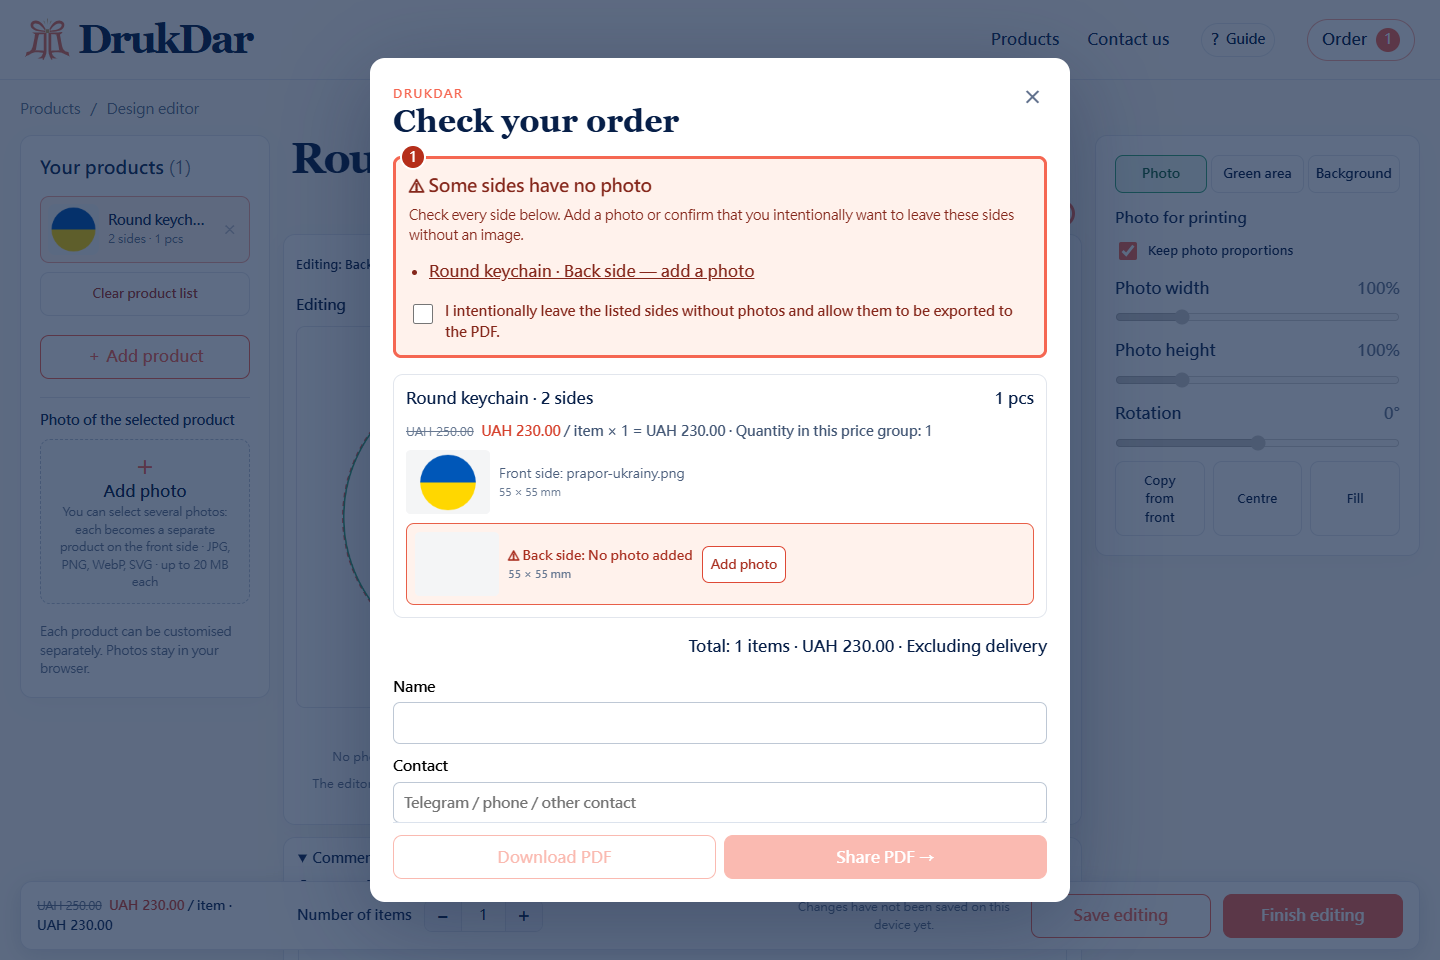
Check the product name, quantity, photo on each side and comment. Make sure the images are on the correct sides.
What if there is no photo on the back?
The editor will show a clear warning. Click the name of the empty side or “Add photo”, to return to that side and upload an image.
If the side should stay blank, confirm this using the checkbox in the warning. Do not confirm a blank side if you intended to print an image on it.
Get the order PDF
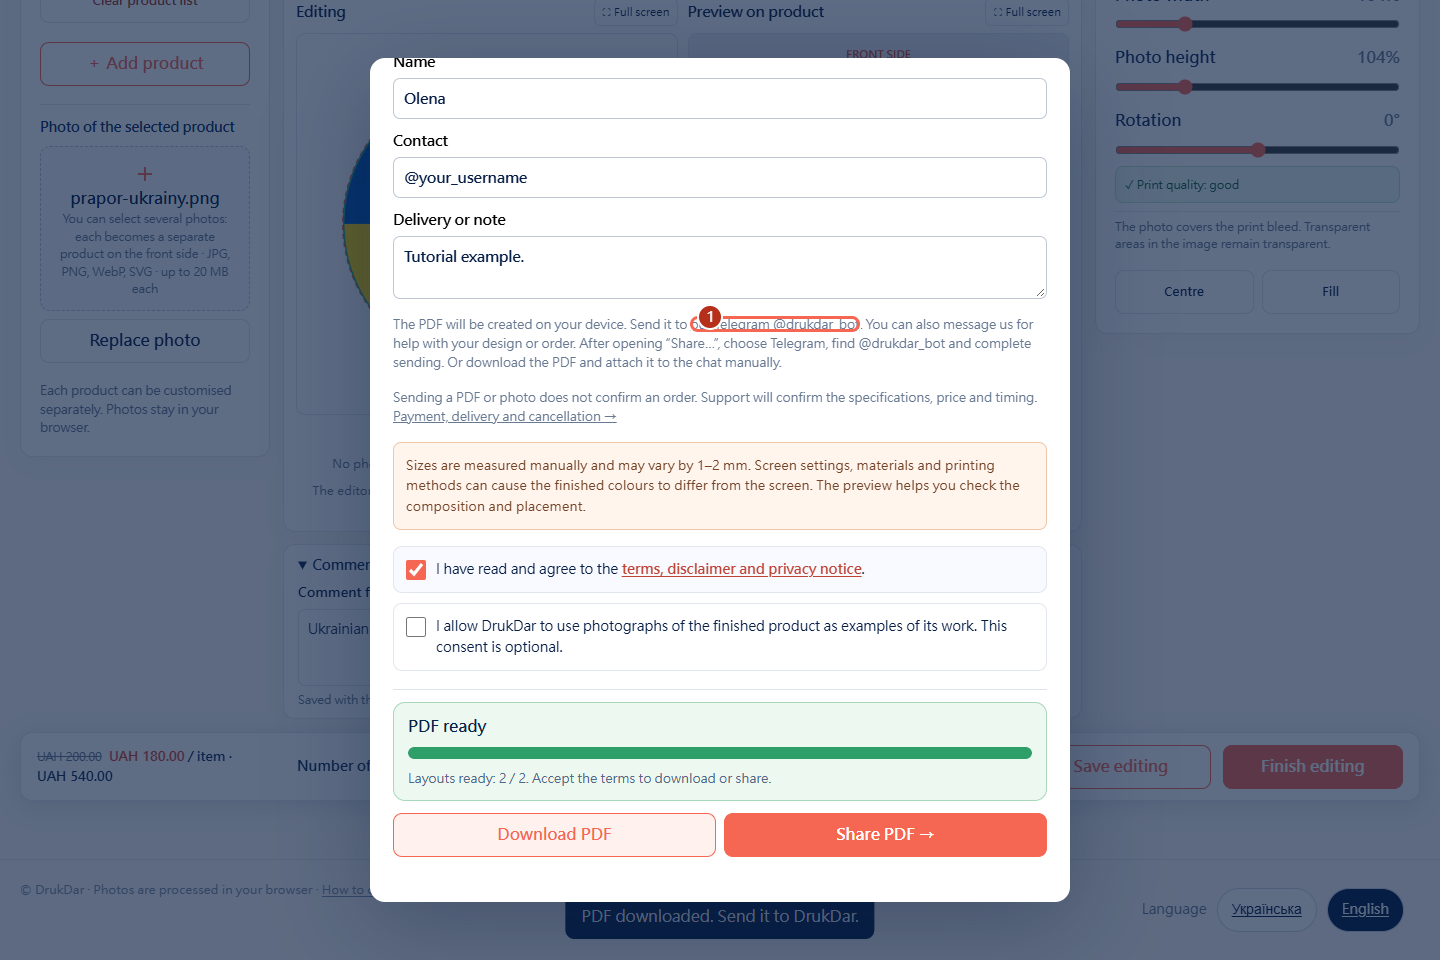
Enter your name (1) and contact (2). Add delivery details or a general note if needed. The details in the screenshots are for practice.
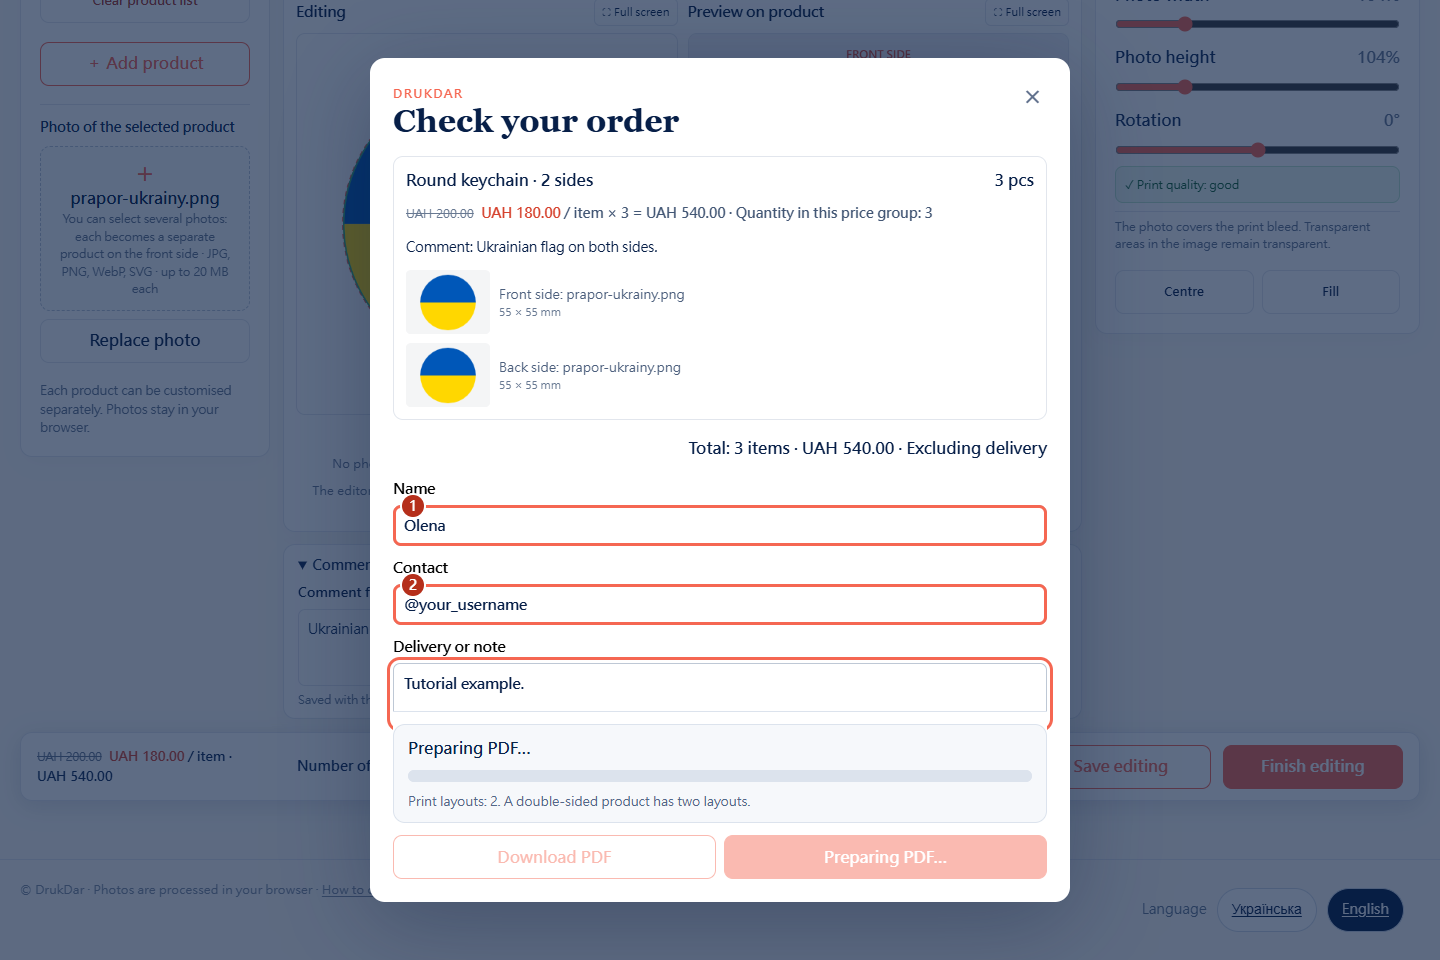
The PDF is prepared automatically after the required details are filled in. Keep the window open: the progress shows the stage and number of layouts processed.
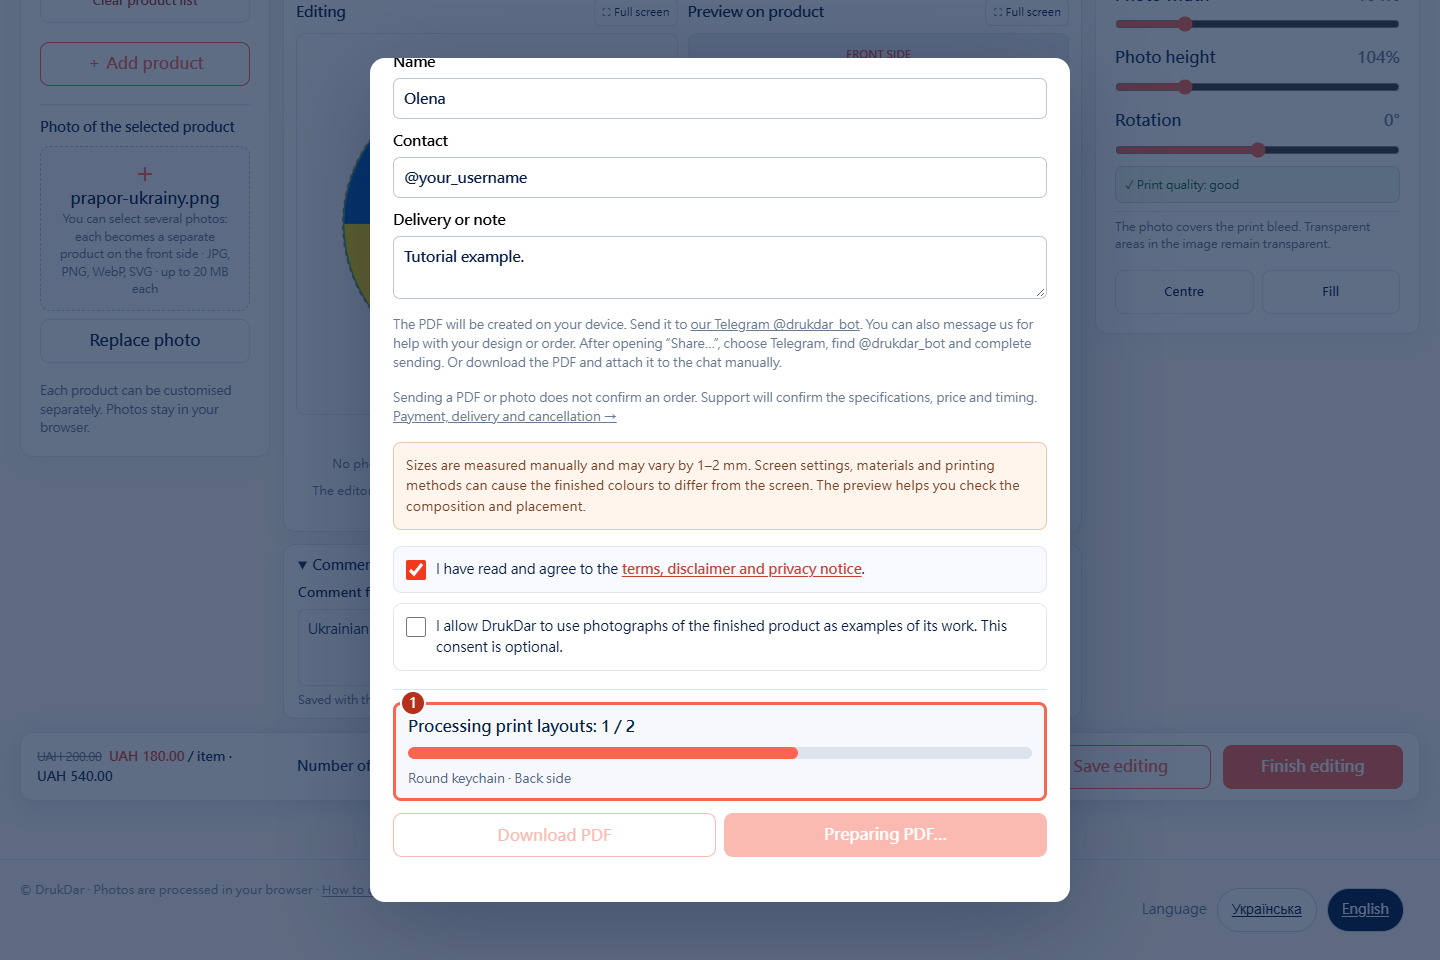
Read the terms and confirm your agreement (1). Permission to show photos of the finished product is separate and optional.
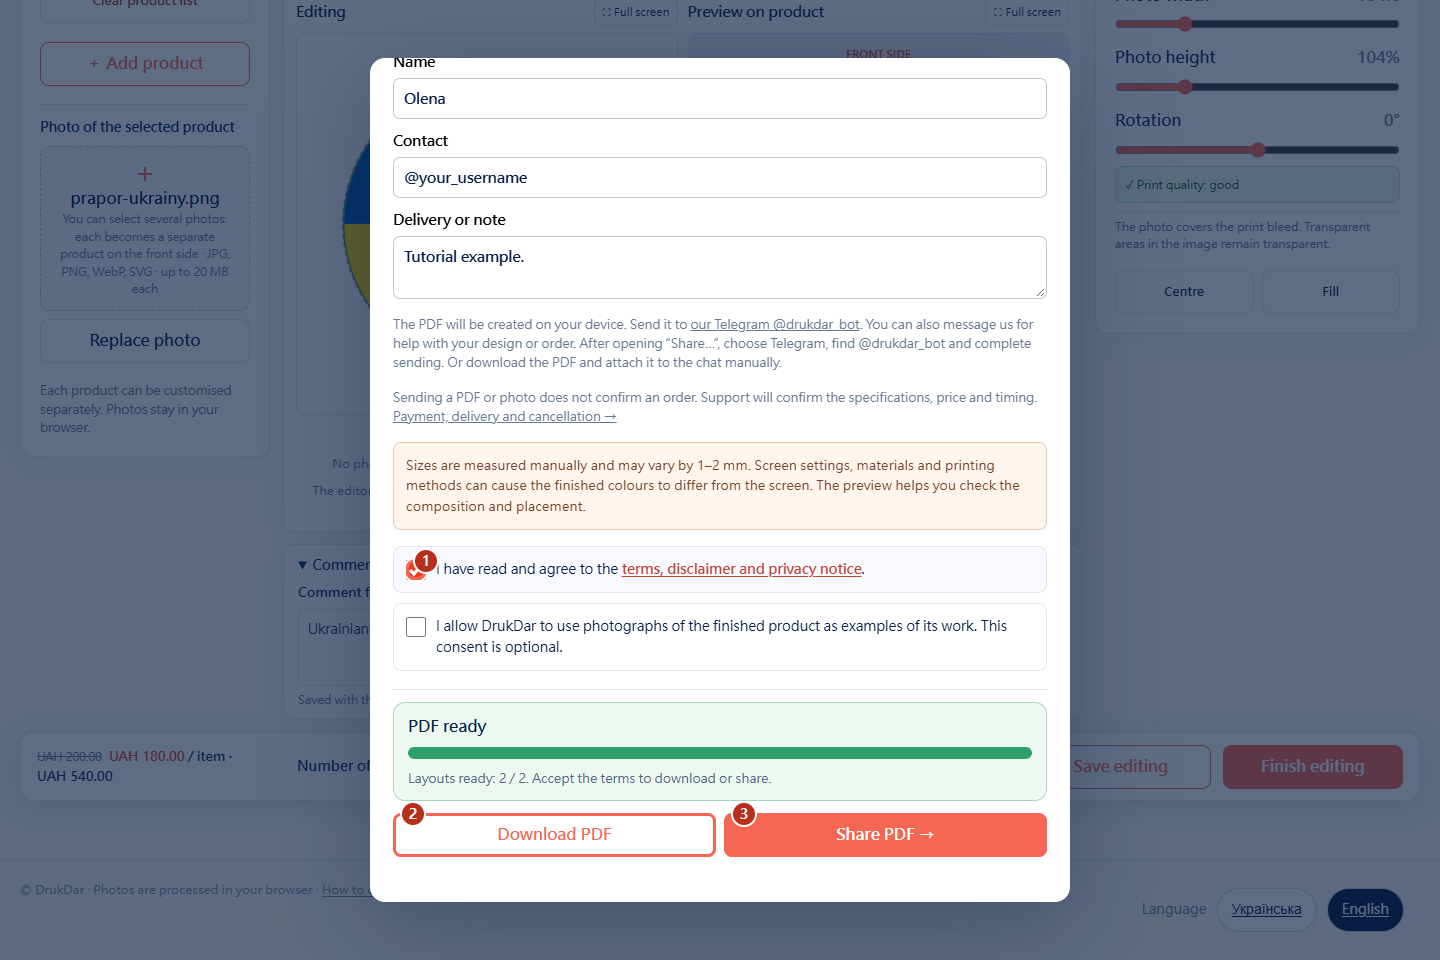
After “PDF ready” click “Share PDF →” (3) and choose Telegram. Or click “Download PDF” (2) to attach the file to the chat yourself.After “PDF ready” click “Download PDF” (2). If your browser supports file sharing, you can also use “Share PDF →” (3).
Send the file to our Telegram
Open @drukdar_bot. The order window also has a link (1). If Telegram shows a “Start”, tap it.
If you chose sharing, open the @drukdar_bot chat and finish sending. For a downloaded PDF, use Telegram’s attachment button and choose the file on your phone.Find the PDF in your downloads folder. Attach it as a file in the @drukdar_bot chat or drag it into the conversation window.
Tell us what you would like made and your preferred deadline. Support will clarify specifications, price and timing before confirming the order. The reply will appear in the same Telegram chat.
A few more useful answers
How do I add another product to this order?
Open “Products / add photo” and click “+ Add product”. Choose a category and product.Click “+ Add product” in the left column, then choose a category and product.
Each design has its own photos, quantity and comment. Switch between them in the product list.
Can I continue editing later?
Click “Save editing” and return in the same browser on the same device. The saved cart does not transfer automatically to another phone or computer.
Can I start with a question?
Yes. Message @drukdar_bot, even if you do not have a PDF yet. We will help clarify the product and design requirements.
Where can I read about payment and delivery?
All the rules are on the “How to order”: payment, Nova Poshta, cancellation and support hours.
Try it with your photo
Create your design
Choose a gift and add your image. Message us if anything is unclear.